Introduction: Why London Fare Zones Matter
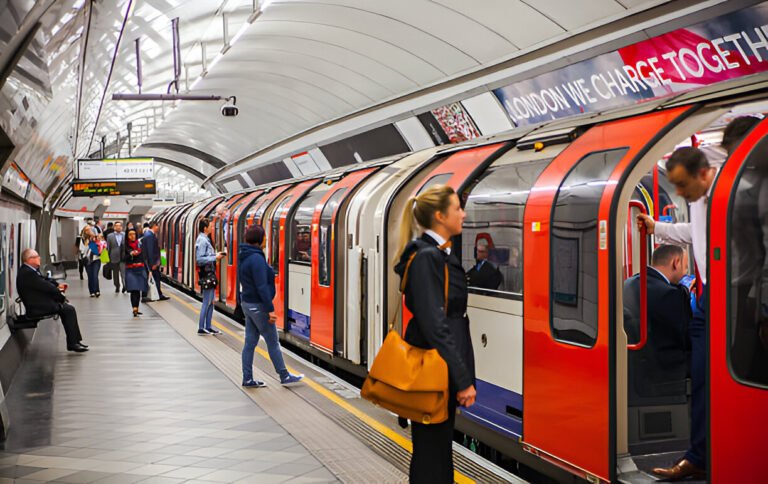
London is one of the most connected cities on the planet, with an extensive public transport network that carries millions of passengers every single day. Whether you’re a first-time tourist arriving at Heathrow, a student settling into university life, or a daily commuter catching the morning Tube, there is one thing you simply cannot ignore: the London fare zones system.
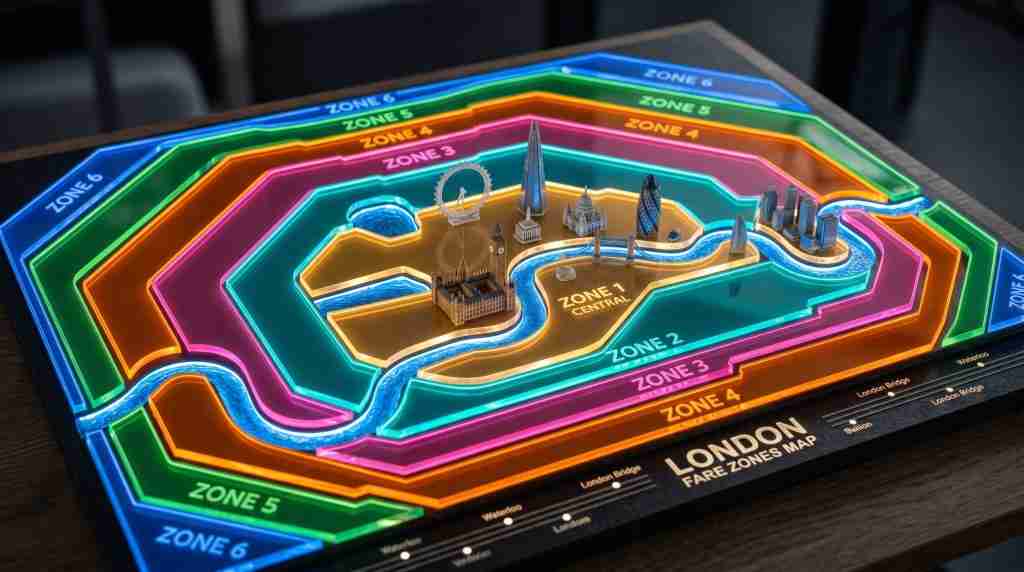
Transport for London (TfL) divides the city and its surrounding areas into nine concentric fare zones, numbered 1 through 9. Zone 1 sits at the heart of the capital, and each subsequent zone fans outward like rings on a map. The zone or zones your journey passes through directly determines what you pay — the more zones you cross, the higher the fare. (London Fare Zones)
Understanding this system isn’t just about saving a few pounds. It’s about making smarter decisions: knowing which ticket to buy, whether an Oyster card or a contactless bank card gives you better value, and how daily and weekly caps work to protect your wallet. This guide breaks it all down — zone by zone — so you can travel London with confidence.
What Are London Fare Zones? A Quick Overview
The fare zone system is the foundation of TfL’s pricing structure. It applies across:
- London Underground (the Tube)
- London Overground
- Elizabeth line (Crossrail)
- Docklands Light Railway (DLR)
- Most National Rail services within Greater London
Zones 1 through 6 form neat, concentric rings across Greater London. Zones 7, 8, and 9 are different — they don’t form complete rings but instead extend outward into neighbouring counties like Buckinghamshire, Essex, and Hertfordshire, covering stations served by TfL services beyond the Greater London boundary. (London Fare Zones)
Buses and trams operate under a flat fare structure, which means zones do not apply to bus travel. Regardless of how many bus stops you ride past or which part of the city you’re in, a single bus journey is charged at the same flat rate. That’s a useful distinction to keep in mind.
TfL tube and rail fares changed in March 2026. Bus and tram fares follow separate TfL and Mayoral fare decisions.
Zone 1: The Heart of London
Zone 1 is the most central — and the most expensive — zone in London. It covers the core of the capital, where you’ll find the city’s most iconic landmarks, world-famous museums, theatre districts, and major transport hubs.
Key areas: Westminster, the City of London, Soho, Covent Garden, Mayfair, Southwark, and the South Bank.
Major stations: King’s Cross St. Pancras, Waterloo, Victoria, Liverpool Street, Paddington, Oxford Circus, London Bridge, and Euston.
Key attractions: The Houses of Parliament, Buckingham Palace, the British Museum, the Tate Modern, St. Paul’s Cathedral, the Tower of London, and Leicester Square.
If you’re visiting London as a tourist and sticking to the sightseeing circuit, the vast majority of your time will be spent within Zone 1. Almost every major gallery, museum, and tourist attraction sits within this central ring. (London Fare Zones)
Fare note: Zone 1 carries a premium compared to other zones. A single off-peak Tube journey within Zone 1 with an Oyster or contactless card costs around £3.00. Peak fares are higher, and the daily cap for Zone 1 alone sits at £8.90 when combined with Zone 2 — making it well worth letting the daily cap system do the work if you’re making multiple journeys.
Zone 2: Inner London’s Cultural Heartbeat
Step outside the core and you enter Zone 2, a densely populated ring that encircles Zone 1 and is home to some of London’s most vibrant neighbourhoods. (London Fare Zones)
Key areas: Camden, Islington, Hackney, Brixton, Hammersmith, Shepherd’s Bush, Bermondsey, and Bethnal Green.
Major stations: Brixton, Camden Town, Stratford, Clapham Junction (for some services), Shepherd’s Bush, and Hackney Central.
Key attractions: Camden Market, the O2 Arena (reachable via Zone 2/3), Brixton Market, Brick Lane, Columbia Road Flower Market, and the Queen Elizabeth Olympic Park.
Zone 2 is extremely popular with young professionals and students, largely because accommodation is more affordable than Zone 1 while still offering excellent Tube and rail connections back into the centre. A journey from Zone 2 into Zone 1 typically takes between 10 and 25 minutes by Underground.
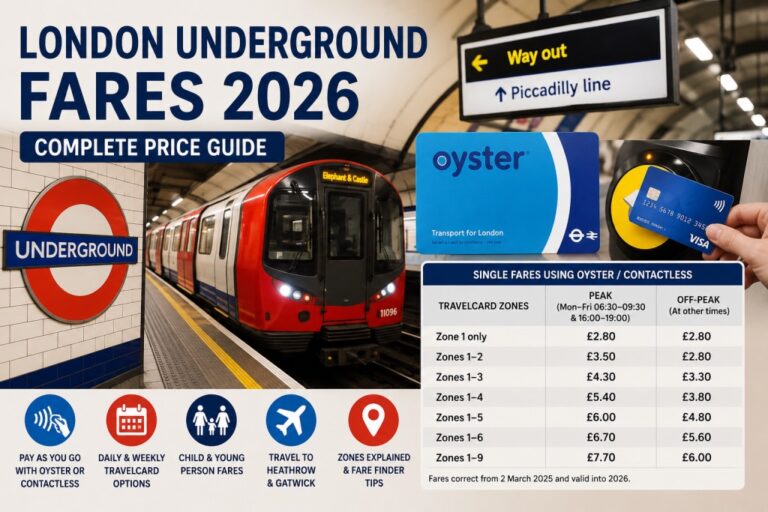
If you’re planning to travel between Zones 1 and 2 repeatedly throughout a day, the combined daily cap of £8.90 (as of March 2026) means you’ll never pay more than that amount on Tube and rail, no matter how many journeys you make.
Zone 3: Suburban Charm with City Access
Zone 3 marks the beginning of London’s outer inner suburbs — areas that feel distinctly residential but remain highly accessible to the centre. (London Fare Zones)
Key areas: Ealing, Harrow (partial), Wembley, Ilford, Forest Hill, Wimbledon (partial), and Stratford (for some services).
Major stations: Ealing Broadway, Wembley Central, Ilford, Wimbledon, and East Ham.
Key attractions: Wembley Stadium, Ealing’s green spaces, Wimbledon (tennis fans, take note), and the leafy environs of Forest Hill with Horniman Museum.
Zone 3 is an excellent base for commuters who want more space and slightly lower rents than Zone 2 without sacrificing too much in travel time. Most journeys from Zone 3 into central London take around 20 to 35 minutes, depending on the line.
The daily cap for Zones 1–3 is £10.50, providing a firm ceiling on costs for those who travel across this range regularly.
Zone 4: Comfortable Outer Suburbs
Zone 4 extends the commuter belt further outward, covering areas that offer a noticeably more suburban feel while still sitting within Greater London’s boundaries. (London Fare Zones)
Key areas: Harrow, Kenton, Hendon, Barking, Romford (partial), Croydon, and Sutton.
Major stations: Harrow-on-the-Hill, Hendon Central, Barking, Ealing Common, and East Croydon.
Key attractions: Alexandra Palace, the green expanses of Harrow, and the retail and cultural hub of Croydon, which has undergone significant redevelopment in recent years.
Families and those seeking quieter living tend to favour Zone 4, where houses are larger and the streets less hectic. Commute times from Zone 4 into central London typically run between 30 and 45 minutes.
Zone 5: Where the City Meets the Countryside
Zone 5 sits at the edge of Greater London, where the urban landscape starts giving way to greener surroundings. Neighbourhoods here often have a village-like quality while still benefiting from TfL connections. (London Fare Zones)
Key areas: Barnet, Chingford, Walthamstow (outer areas), Uxbridge (partial), Edgware, and Streatham.
Major stations: Edgware, Chingford, Brentwood (for some services), Uxbridge, and High Barnet.
Key attractions: The green belt borders, Epping Forest (reachable from nearby stations), the RAF Museum in Hendon, and the ancient hilltop market town of Barnet.
Zone 5 is popular with families and those who commute into London but prefer the feel of a smaller community. Rents and property prices are considerably lower than inner zones.
Zone 6: London’s Outermost Ring
Zone 6 is the final zone that falls entirely within the Greater London administrative boundary. It represents the outer edge of what most Londoners consider the city proper. (London Fare Zones)
Key areas: Heathrow Airport, Upminster, Romford, Dartford (outer), Croydon (outer areas), and Watford Junction (partial).
Major stations: Heathrow Terminals 2, 3, 4, and 5 (yes, all served by the Tube), Upminster, Romford, and Watford.
Key attractions: Heathrow Airport — the busiest in the UK — is a Zone 6 destination when travelling by Tube or Elizabeth line. Note that all Tube and Elizabeth line journeys to and from Heathrow that pass through Zone 1 are charged at peak rates, regardless of the time of travel.
The daily cap for Zones 1–6 travel is a key benchmark used in London’s transport planning. It represents the widest coverage available within the standard capped zone structure for Greater London.
Zones 7, 8, and 9: Beyond Greater London
Here’s where the zone system becomes a little different. Zones 7, 8, and 9 do not form complete rings around London. Instead, they extend outward in specific directions, covering stations served by certain TfL and National Rail services beyond the Greater London boundary. These zones reach into Buckinghamshire, Essex, and Hertfordshire. (London Fare Zones)
Fares for Zones 7–9 follow a slightly different pricing formula compared to Zones 1–6, and they increase in line with national rail fares rather than purely TfL’s own fare structure.
Zone 7: Stepping Into the Home Counties
Key areas: Watford High Street, Croxley Green, Rickmansworth, and Chorleywood.
Major stations: Watford (Metropolitan line), Rickmansworth, and Croxley.
Zone 7 is where the Metropolitan line pushes deep into Hertfordshire. It’s a popular choice for those who want a quieter life with swift access to central London. Commute times typically fall between 50 and 70 minutes to central London. (London Fare Zones)
Zone 8: Tranquil Chiltern Towns
Key areas: Chalfont & Latimer, the Chiltern Hills, and parts of southern Buckinghamshire.
Major stations: Chalfont & Latimer.
Zone 8 is genuinely semi-rural. Those who live here often describe the lifestyle as the best of both worlds: surrounded by the rolling Chiltern Hills yet connected to London’s Tube network. Commute times generally range from 65 to 80 minutes. (London Fare Zones)
Zone 9: The Outer Extremes — Chesham and Amersham
Key areas: Chesham and Amersham in Buckinghamshire.
Major stations: Chesham and Amersham — the two most distant stations on the entire London Underground network.
Zone 9 is a remarkable footnote in London transport history. Amersham and Chesham sit at the far end of the Metropolitan line, offering a rural lifestyle that is genuinely countryside in character. On a clear day, the Chiltern Hills visible from these stations look nothing like the London most visitors imagine. Commute times to central London can exceed 80 to 90 minutes. (London Fare Zones)
How Fares Are Calculated: The Zone-Crossing Principle
The core principle is straightforward: the number of zones you travel through determines your fare. But a few nuances are worth knowing.
Peak vs Off-Peak: Peak fares apply Monday to Friday (excluding public holidays) between 06:30 and 09:30, and again between 16:00 and 19:00. All other times are off-peak and carry lower fares. One useful exception: if you travel from a station outside Zone 1 into Zone 1 between 16:00 and 19:00, you are still charged the off-peak rate. This is sometimes called the evening peak exception and can save money for inbound evening commuters.
The Minimum Fare Rule: Even a one-stop Tube journey falls within the zone-based fare structure. There’s no discount for very short distances on the Underground.
Multi-Zone Journeys: If your journey passes through a zone you don’t start or end in — for example, travelling from Zone 2 on one side of London to Zone 2 on the other side, passing through Zone 1 in the middle — you are charged for all zones your journey crosses. In this case, a Zone 1-2 fare would apply even though you didn’t start or end in Zone 1.
Oyster Card, Contactless, and Daily Caps: How to Pay Smart
One of the smartest things about London’s fare system is the automatic daily and weekly capping that applies when you pay with an Oyster card or a contactless bank card (including contactless debit/credit cards and smartphone/smartwatch payments). (London Fare Zones)
Daily Caps (from March 2026)
A daily cap is the maximum you’ll pay in a single day for all Tube, Overground, DLR, Elizabeth line, and most National Rail journeys within the capped zones. Once you hit the cap, every subsequent journey that day is free.
Here are the key daily cap figures for 2026:
| Zones Covered | Daily Cap (Peak) |
| Zones 1–2 | £8.90 |
| Zones 1–3 | £10.50 |
| Zones 1–4 | £12.80 |
| Zones 1–5 | £15.30 |
| Zones 1–6 | £16.30 |
The cap resets at 04:30 every morning, so night journeys after midnight can still be covered under the previous day’s cap until 04:30.
Weekly Caps
Weekly caps run Monday to Sunday and are equivalent to the cost of a weekly Travelcard for your zones. They’re ideal for commuters and are applied automatically — you don’t need to buy anything in advance. Simply use your Oyster or contactless card every day and the cap is applied at the end of the week. (London Fare Zones)
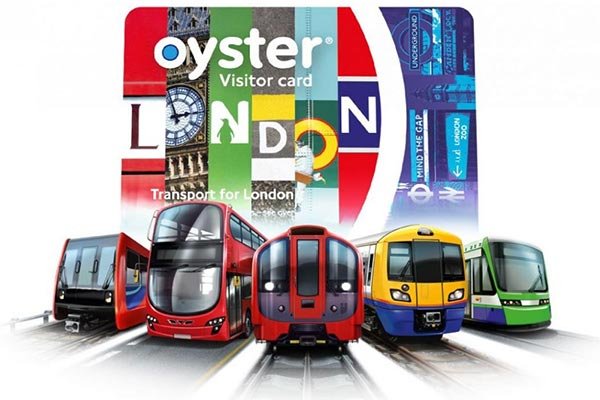
Oyster Card vs Contactless
Both Oyster and contactless bank cards charge the same single-fare rates and apply the same daily and weekly caps. The key differences are:
- Oyster: Requires a £10 refundable deposit to purchase the card. Can hold up to £90 of credit. Widely available at Tube stations and some newsagents.
- Contactless: No card to buy or deposit to pay. Simply use your existing bank card. Particularly convenient for visitors who prefer not to manage a separate card.
- Rail card discounts can be applied to an Oyster card to get up to one-third off pay-as-you-go fares, which is a significant saving for eligible holders.
The Hopper Fare for Buses
While zones don’t apply to buses, London has a Hopper Fare that allows unlimited bus and tram journeys within a 60-minute window for a single flat fare of £1.75 (frozen since 2023). This makes buses an incredibly economical option for short hops around London.
Travelcards: Are They Worth It?
A Travelcard gives you unlimited travel across all TfL services — Tube, Overground, DLR, Elizabeth line, and buses — within your chosen zones for a flat daily or weekly price.
Day Travelcards come in two varieties:
- All-Day (Peak) Travelcard: Valid for travel at any time, including peak hours.
- Off-Peak Day Travelcard: Valid from 09:30 on weekdays, and all day on weekends and public holidays.
For most visitors, the daily cap via Oyster or contactless is either cheaper or equivalent to a Day Travelcard. It’s worth doing the maths for your specific travel plans before committing to a Travelcard. However, Travelcards do offer one advantage that pay-as-you-go doesn’t: they’re also valid on National Rail services within the covered zones, which may be useful for certain routes.
Common Mistakes to Avoid
Forgetting to touch out: When you travel by Tube, Overground, DLR, or Elizabeth line, you must tap in and tap out at the destination. If you forget to tap out, you’ll be charged a maximum or “incomplete journey” fare, which is nearly always higher than the correct fare. Buses don’t require tapping out.
Using different payment methods on the same day: To benefit from daily capping, all your journeys must be made on the same Oyster card or the same contactless card/device. Mixing an Oyster card with a contactless card, or using two different bank cards, means your journeys won’t be combined toward a single cap.
Heathrow journeys: All Tube and Elizabeth line journeys to or from Heathrow that pass through or end in Zone 1 are automatically charged at the peak rate, regardless of the time of travel. This is a specific exception built into the fare system.
Zone 2 boundary confusions: Some stations sit on the border of two zones — for example, a station may be classed as both Zone 2 and Zone 3. In these cases, the cheaper fare applies for journeys where the zone classification benefits you. TfL’s journey planner will always calculate the cheapest applicable fare automatically.
Tips for Getting the Most From London’s Zone System
Plan around peak hours. If your schedule allows, travelling just outside peak windows — after 09:30 in the morning or after 19:00 in the evening — can meaningfully reduce your single-journey fares on the Tube.
Use TfL’s Journey Planner. The official TfL Journey Planner (available at tfl.gov.uk or via the TfL Go app) is the most reliable tool for calculating exact fares between any two stations. It accounts for your payment method, time of travel, and any applicable discounts.
Register your Oyster card. If you register your Oyster card online with TfL, your credit is protected if the card is lost or stolen. You can also track journey history and set up auto top-up so the card never runs out at an inconvenient moment.
Consider a Railcard. If you’re a student, a senior, or regularly travel with a companion, a National Railcard can be linked to your Oyster card to give you up to one-third off pay-as-you-go rail fares. There’s a minimum fare that applies during peak hours to prevent abuse, but the savings on off-peak travel are substantial.
Children travel free or at reduced rates. Children under 11 travel free on all TfL services when accompanied by a fare-paying adult. Those aged 11–17 can apply for a Zip Oyster photocard offering free or heavily discounted travel. Students aged 18 or over enrolled at a London educational institution may qualify for a 30% discount Oyster photocard.
Which Zone Should You Stay In?
This question comes up constantly for visitors planning a trip to London.
Zone 1 is ideal if you want everything on your doorstep: the museums, galleries, theatres, and tourist attractions. It’s the most expensive option for accommodation, but you may spend less on transport.
Zone 2 hits the sweet spot for most visitors and short-term residents. You’re typically 15–25 minutes from central London, accommodation is more affordable, and the neighbourhoods — from Brixton to Hackney — offer a more authentic London experience than the tourist-heavy centre.
Zones 3–4 are best suited to longer stays, students, and those prioritising space and affordability over proximity. The commute into Zone 1 is manageable, and the savings on rent or hotels can be significant.
Zones 5–6 make sense if you’re visiting friends or family in outer London, arriving or departing from Heathrow, or simply want the most affordable accommodation possible.
Zones 7–9 are for those who have specific reasons to be in those areas — perhaps a work placement in Watford, a university in Hertfordshire, or a preference for the Chiltern countryside.
Frequently Asked Questions
Do zones apply to London buses?
No. Bus fares are flat-rate and zone-independent. A single bus journey costs £1.75, and the Hopper Fare allows unlimited bus trips within a 60-minute window at that same price.
What if my journey crosses multiple zones?
You’re charged for all zones your journey passes through. TfL calculates the cheapest applicable fare for your specific origin and destination.
Can I use contactless from abroad?
Yes. Most international contactless bank cards, Apple Pay, and Google Pay work on London’s transport network. Check with your bank about any foreign transaction fees, as TfL’s charges will be applied in British pounds.
What happens if I run out of Oyster credit mid-journey?
If your Oyster card has insufficient funds when you tap in, you may be refused entry through the barrier. TfL does offer a small “negative balance” allowance in some situations to prevent passengers from being stranded, but it’s always best to keep sufficient credit on your card.
Is the zone system the same for all times of day?
The zones themselves don’t change, but the fares within those zones vary by time of day. Peak fares apply during morning and evening rush hours on weekdays; off-peak fares apply at all other times.
Conclusion: Master the Zones, Master London
London’s fare zone system may appear complicated at first glance, but it operates on a logical, consistent principle: your cost reflects your distance from the centre. Once you understand that framework — and pair it with the right payment method, awareness of peak hours, and knowledge of daily caps — navigating the city becomes far less daunting.
Whether you’re planning a whistle-stop weekend in Zone 1, settling into a Zone 2 flat for a month, or commuting daily from Zone 5, this system is designed to be fair and transparent. The tools are all there: the Oyster card, contactless payments, the TfL app, and the Journey Planner. The key is simply knowing how to use them.
Sources checked: TfL Tube and rail fares and TfL fare capping. Prices checked on 1 August 2026; confirm the current fare for your exact journey before travelling.
Fare figures checked 14 August 2026 against TfL tube and rail fares. Prices and caps can change, so verify the current fare before travelling.